List all alerts in a SharePoint farm

The PowerShell below allows you to list out in CSV format all the Alerts users have set on all lists in all sites, in all site collections, in all the web applications in a SharePoint Farm.

This script is a modification of the script at http://www.deliveron.com/blog/post/Find-all-Alerts-in-a-Site-Collection-in-SharePoint-2010.aspx by Jess Collicott which listed a site collection’s alerts.

####################################################################################################
#
#  Author.......: Khalid Ansari
#  Date.........: 07 Apr 2014
#  Description..: Output alerts set on all sites in all site collections in all web apps in the farm
#				  to a CSV file
#
####################################################################################################
Add-PSSnapin microsoft.sharepoint.powershell

$spAssignment = Start-SPAssignment

$webApps = Get-SPWebApplication -IncludeCentralAdministration
$alertResults = @()
foreach($webApp in $webApps)
{
    $webApp.url
	foreach ($site in $webApp.Sites) {
		$site.url
		foreach ($web in $site.AllWebs) {
			$web.url
			foreach ($alert in $web.Alerts){
				$alertResult = New-Object PSObject
				$alertResult | Add-Member -type NoteProperty -name "List URL" -value ($web.URL + "/" + $alert.ListUrl)
				$alertResult | Add-Member -type NoteProperty -name "Alert Title" -value $alert.Title
				$alertResult | Add-Member -type NoteProperty -name "Alert Type" -value $alert.AlertType
				$alertResult | Add-Member -type NoteProperty -name "Subscribed User" -value $alert.User
				$alertResults += $alertResult
			}
		}
	}
}
$alertResults

$alertResults | Export-CSV "FarmAlerts.csv"
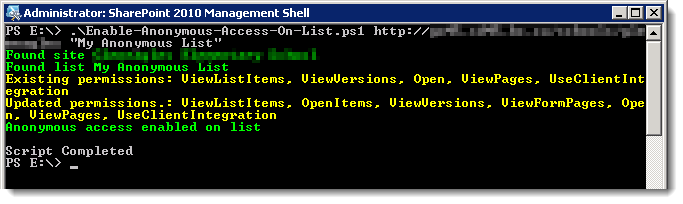
Write-Host
Write-Host "Script Completed"
Stop-SPAssignment $spAssignment

The script will create a file called FarmAlerts.csv with a list of all the alerts.

Change SharePoint Management Shell default folder

I often pin the SharePoint Management Shell to the taskbar on SharePoint servers I am working on as shown below

spmgmtshellshortcut01

When I click on it I want it to open in a folder of my choice instead of the default, which is the users root folder.

Easy enough, but unfortunately you can’t just change the “Start in:” folder on the shortcut. You must change the “Target:” value instead. Every time I go to change the shortcut I mess it up because of the somewhat complicated target string.

I will show you how to change this target string to do what we want. First right-click on your taskbar shortcut, then right-click on the “SharePoint 2013 Management Shell” menu item, then click on propertiesspmgmtshellshortcut02

You will get the following dialog box:spmgmtshellshortcut03

Your “Target:” value should look like:

C:\Windows\System32\WindowsPowerShell\v1.0\PowerShell.exe -NoExit  ” & ‘ C:\Program Files\Common Files\Microsoft Shared\Web Server Extensions\15\CONFIG\POWERSHELL\Registration\\sharepoint.ps1′”

Edit this value and add the folder you want to open in as shown below

C:\Windows\System32\WindowsPowerShell\v1.0\PowerShell.exe -NoExit  ” & ‘ C:\Program Files\Common Files\Microsoft Shared\Web Server Extensions\15\CONFIG\POWERSHELL\Registration\\sharepoint.ps1’; cd D:\SharePoint\Scripts

Note that the new command goes between the last single and double quote of the original string.

Since all we are doing here is adding a PowerShell command, you could technically add any other commands you wanted or even run a script if you want.

Your shortcut will now open in the default folder of your choice

spmgmtshellshortcut04

Login prompt accessing list on SharePoint site with anonymous access enabled

PROBLEM

You have a SharePoint Publishing site with anonymous access enabled. Users are able to get to most of the pages and document libraries that you have exposed via anonymous access, but you have one or more lists which stubbornly prompt the user to login.

This problem also commonly occurs on anonymous access Blog sites living under a Publishing site where users are prompted to login to post comments. That is because comments are stored in a SharePoint list and this problem is related to SharePoint lists exposed to anonymous users.

SOLUTION

Many solutions to this problem suggest disabling the Site Collection feature ViewFormPagesLockdown as this is enabled by default on Publishing sites. This is a bad idea as it exposes various pages such as /layouts/viewlsts.aspx, more commonly known as Site Contents, that you do not want to give anonymous users access to. ViewFormPagesLockdown on an anonymous site is a good thing, but it does cause us grief with lists we want to expose anonymously.

I have created a PowerShell script below that enables anonymous access on a list living under a publishing site without having to resort to disabling the ViewFormPagesLockdown feature.

####################################################################################################
#
#  Author.......: Khalid Ansari
#  Date.........: 17 Jan 2014
#  Description..: Allow anonymous access to a list in a publishing site
#                 For details of the problem this script solves go to http://wp.me/p3Cf9P-aL
#  Parameters...: [Required] SiteUrl = Url of site (not site collection, unless they are the same)
#                 [Required] ListDisplayName = Display name of list
#
####################################################################################################
param(
    [parameter(Mandatory=$true)] [string] $SiteUrl
    , [parameter(Mandatory=$true)] [string] $ListDisplayName
)

$spAssignment = Start-SPAssignment

$web = Get-SPWeb $SiteUrl -ErrorAction Stop
Write-Host -f Green "Found site $($web.Title)"
$list = $web.Lists[$ListDisplayName]
if ($list) {
	Write-Host -f Green "Found list $($list.Title)"

	$list.BreakRoleInheritance($true, $false)
	$list.AllowEveryoneViewItems = $true
	Write-Host -f Yellow "Existing permissions: $($list.AnonymousPermMask64)"
	$list.AnonymousPermMask64 = "ViewPages, OpenItems, ViewVersions, Open, UseClientIntegration, ViewFormPages, ViewListItems";
	$list.Update();
	Write-Host -f Yellow "Updated permissions.: $($list.AnonymousPermMask64)"
	Write-Host -f Green "Anonymous access enabled on list"
}
else {
	Write-Host -f Red "List $($ListDisplayName) not found"
}

$web.Dispose()
Write-Host
Write-Host "Script Completed"
Stop-SPAssignment $spAssignment

Running the script above results in output similar to that shown below:

listanonaccess01

Note that in order to enable these permissions it is necessary for the script to break permission inheritance on the list. After running the above script your list should be accessible anonymously and you didn’t have to disable the ViewFormPagesLockdown feature.

Delete the Merge Documents and Relink Documents views on a forms library

I recently came across a situation where I needed to remove the “Merge Documents” and “Relink Documents” views on a forms library so that the users wouldn’t hurt themselves.

deletemergeview01

I think the “Merge Documents” link is created because of the setting shown below in InfoPath Form Options although I have not verified this.

deletemergeview02

These views do not show up in the Views section at the bottom of the Library Settings so there is no easy way to delete them. I checked in SharePoint Manager 2013 and could see the views but not delete them for some reason even though I had permissions.

So I wrote the following PowerShell script to delete the views.

####################################################################################################
#
#  Author.......: Khalid Ansari
#  Date.........: 08 Nov 2013
#  Description..: Delete Merge and Relink views on a SharePoint list
#  Parameters...: [Required] SiteUrl = Url of site
#				  [Required] ListDisplayName = Display name of list
#
####################################################################################################
param(
	[parameter(Mandatory=$true)] [string] $SiteUrl
	, [parameter(Mandatory=$true)] [string] $ListDisplayName
)

function DeleteView([object] $list, [string] $viewName)
{
	$view = $list.Views[$viewName]
	if ($view)
	{
		Write-Host "Found view $($view.Title). Deleting view..."
		$list.Views.Delete($view.ID)
		$list.Update()
		$view = $list.Views[$viewName]
		if (!$view)
		{
			Write-Host "View deleted"
		}
	}
	else
	{
		Write-Host "View $($viewName) not found"
	}
}

$spAssignment = Start-SPAssignment

$web = Get-SPWeb $SiteUrl
$list = $web.Lists[$ListDisplayName]

DeleteView $list "Merge Documents"
DeleteView $list "Relink Documents"

$web.Dispose()

Stop-SPAssignment $spAssignment

You could argue that they should not be deleted because they have some useful reason for being there and that is entirely possible, but in this instance I needed to zap them since merging of the InfoPath documents would have caused havoc with the clients business process and life is too short to spend time explaining relinking to an end user.

Migrate from classic-mode to claims-based authentication in SharePoint 2013 the easy way

When migrating a content database from a SharePoint 2010 web application using classic-mode authentication to a SharePoint 2013 web application using claims-based authentication Microsoft recommends converting the web application and all its content databases to claims-based authentication in SharePoint 2010 first and then migrating the web application and all its content databases over to SharePoint 2013. See Migrate from classic-mode to claims-based authentication in SharePoint 2013 for all the painful details.

That is a laborious way to do it, because it implies the following process:

  1. Recreate the web application and all its content databases in a Test farm
  2. Convert the web application to claims-based authentication in the Test farm (unless you feel this is something you want to do in your Production farm just to keep your job interesting).
  3. Detach the database(s) from the SharePoint 2010 Test farm’s SQL Server, copy them over to the SharePoint 2013 Production farm’s SQL Server and attach them
  4. Run Mount-SPContentDatabase etc.

If you are the kind of person who craves this kind of excitement in their lives stop reading now because you will be disappointed by the simplicity of the process described below.

The quick and easy way to do the above:

  1. Detach the database(s) from the SharePoint 2010 Production farm’s SQL Server, copy them over to the SharePoint 2013 Production farm’s SQL Server and attach them
  2. Run Mount-SPContentDatabase etc.
  3. Run the PowerShell below to convert the content database(s) to claims-based authentication
$wa = Get-SPWebApplication http://www.mydomain.com
$acc = 'DOMAIN\SP_Farm'
$arguments = New-Object Microsoft.SharePoint.Administration.SPWebApplication+SPMigrateUserParameters
$arguments.AddDatabaseToMigrate($wa.ContentDatabases[0])
# The line above only adds the first content database in
# the web application for demonstration purposes. You may
# need to iterate through your databases and add them all.
$wa.MigrateUsersToClaims($acc, $false, $arguments)

The second easier method above gives you the same results as the first laborious process but with considerably less pain.

Thanks to Steve Peschka for providing the PowerShell commands above and Chris Weldon for making the PowerShell commands behave in a civilized manner. A couple of points to note from their blog posts, first do not change the name of the parameter “$arguments” to anything else as this causes problems. Second, if you use the SharePoint farm account as I did above then make sure the second parameter to the MigrateUsersToClaims method is set to $false.

For migrations Microsoft always talks about Detach/Attach for migrating databases but I prefer Backup/Restore, but that is something I will discuss in more detail in another post.