Delete the Merge Documents and Relink Documents views on a forms library

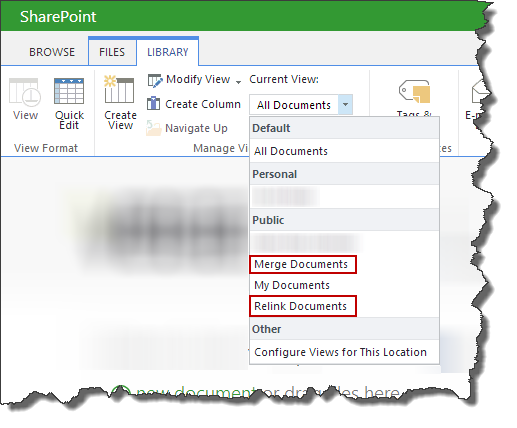
I recently came across a situation where I needed to remove the “Merge Documents” and “Relink Documents” views on a forms library so that the users wouldn’t hurt themselves.

deletemergeview01

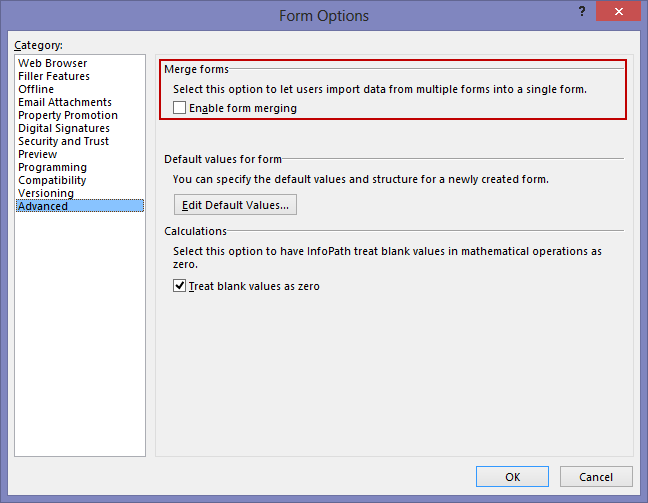
I think the “Merge Documents” link is created because of the setting shown below in InfoPath Form Options although I have not verified this.

deletemergeview02

These views do not show up in the Views section at the bottom of the Library Settings so there is no easy way to delete them. I checked in SharePoint Manager 2013 and could see the views but not delete them for some reason even though I had permissions.

So I wrote the following PowerShell script to delete the views.

####################################################################################################
#
#  Author.......: Khalid Ansari
#  Date.........: 08 Nov 2013
#  Description..: Delete Merge and Relink views on a SharePoint list
#  Parameters...: [Required] SiteUrl = Url of site
#				  [Required] ListDisplayName = Display name of list
#
####################################################################################################
param(
	[parameter(Mandatory=$true)] [string] $SiteUrl
	, [parameter(Mandatory=$true)] [string] $ListDisplayName
)

function DeleteView([object] $list, [string] $viewName)
{
	$view = $list.Views[$viewName]
	if ($view)
	{
		Write-Host "Found view $($view.Title). Deleting view..."
		$list.Views.Delete($view.ID)
		$list.Update()
		$view = $list.Views[$viewName]
		if (!$view)
		{
			Write-Host "View deleted"
		}
	}
	else
	{
		Write-Host "View $($viewName) not found"
	}
}

$spAssignment = Start-SPAssignment

$web = Get-SPWeb $SiteUrl
$list = $web.Lists[$ListDisplayName]

DeleteView $list "Merge Documents"
DeleteView $list "Relink Documents"

$web.Dispose()

Stop-SPAssignment $spAssignment

You could argue that they should not be deleted because they have some useful reason for being there and that is entirely possible, but in this instance I needed to zap them since merging of the InfoPath documents would have caused havoc with the clients business process and life is too short to spend time explaining relinking to an end user.

SlickRun – Launch any application or web site in half a dozen keystrokes or less

For years now (since about 2004 and Windows XP) I have used SlickRun created by Eric Lawrence on every PC and Windows version I have owned. SlickRun allows you with a few keystrokes (in my case typically less than five) to launch one or more applications, web sites in a browser, search the Internet, change screen resolution or do pretty much anything that can be done by launching an application or running a PowerShell or batch command script.

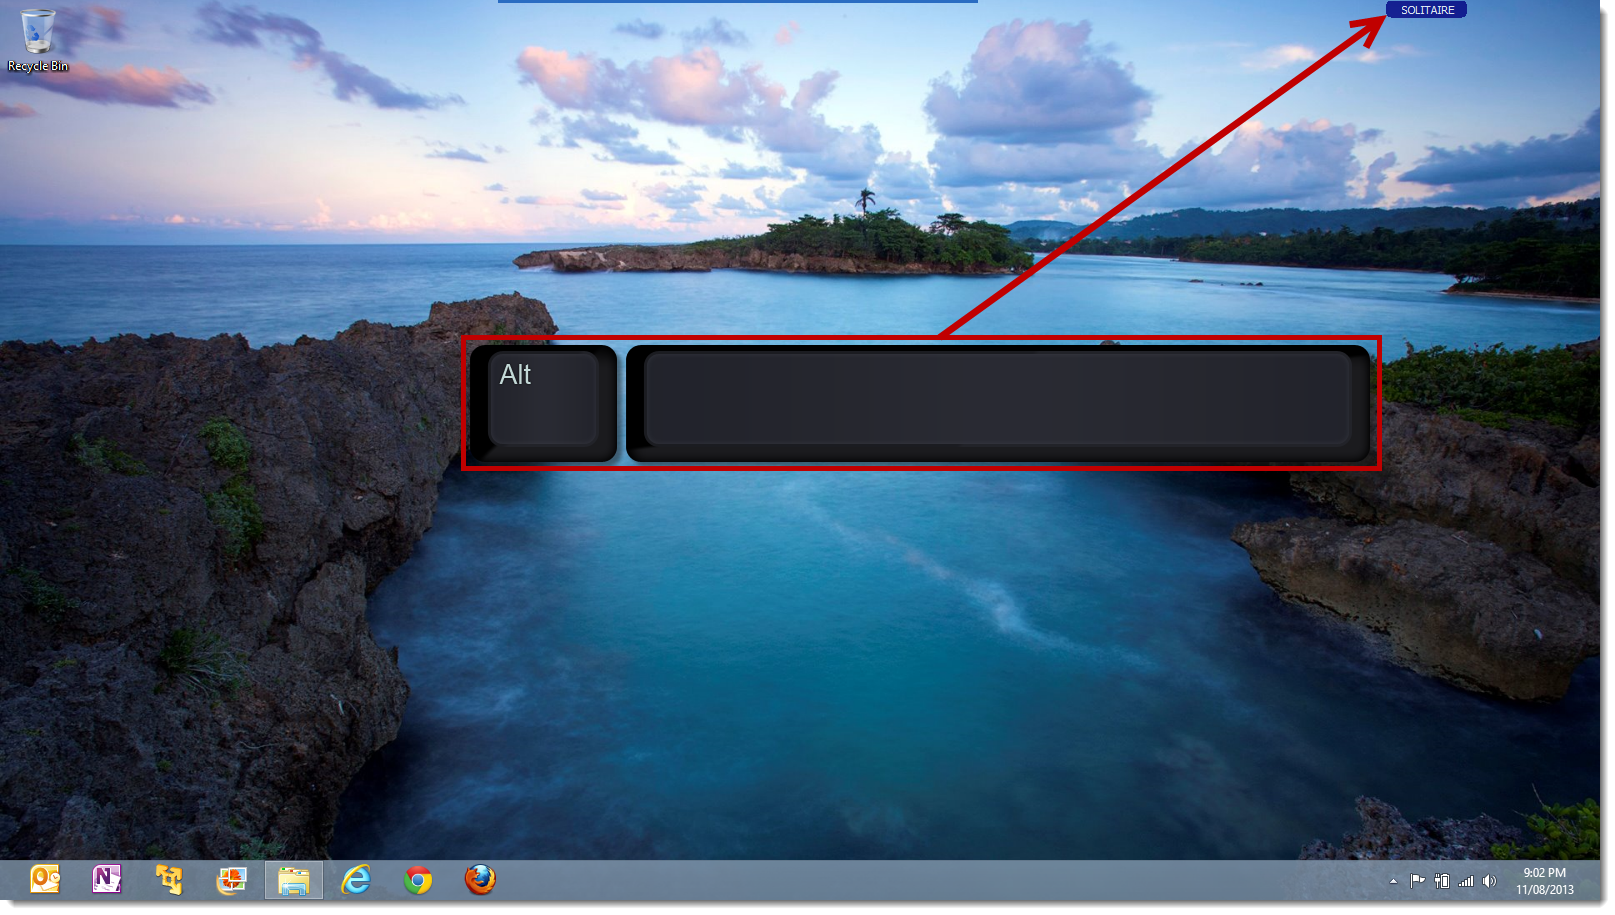
SlickRun is a tiny command prompt style window slickrun02 which can be always visible on your desktop or hidden when not in use. It is accessed by typing a user configurable hot key. I set my hot key to Alt+Space as this typically doesn’t interfere with any other applications or Windows functionality. The hot key activates the SlickRun command prompt window and you can start typing in it.

slickrun01

The command prompt is where the magic happens. SlickRun allows you to set up MagicWords which expand into a full command. For example I could setup a MagicWord called “ssp” which expands into the URL shown below

slickrun03

Running this MagicWord by typing s+s+p+Enter in the SlickRun command prompt would first prompt me to enter a search term which it would put into the command line at the $W$ position. It would then send the entire URL to the command prompt which would cause my default browser to open with the URL. This MagicWord makes it really easy to search for “sharepoint 2010 ” using my default search provider.

SlickRun auto-completes your MagicWords and saves your command history so the more you use a MagicWord the quicker it auto-completes. I usually only have to type the first one or two characters of the MagicWord and press enter to execute it.

You can have an unlimited number of MagicWords and MagicWords can be as long and descriptive or as short and cryptic as you want. You can create a MagicWord that executes multiple other MagicWords using the @MULTI@ macro allowing you to start multiple applications or open multiple web sites with a few keystrokes.

SlickRun has lots of configuration options including what to show in the SlickRun window by default. You can show the date and time, IP address, free memory, etc. I use SlickRun on all my machines so I set it to show my machine name that way when I remote desktop into another machine I know which SlickRun window I am typing stuff into.

SlickRun hasn’t been updated since 2011. That may freak some people out, but honestly the reason it hasn’t been updated is that there isn’t anything lacking in the application. Not once have l thought to myself “I wish SlickRun would do…” in all the time I have used the application. Oh actually come to think of it, there is one minor thing I would like, which is to be able to multi-select MagicWords and delete more than one at a time. OK, apart from that I don’t have any complaints.

There aren’t many applications I can say I have used non-stop since 2004. SlickRun is definitely on top of that list. Honestly I can’t imagine life without it.

There are other similar utilities out there. Launchy being the most prominent. I tried it and immediately went back to SlickRun. In my opinion it didn’t even come close.

Considering how much time I spend in front of a computer I conservatively estimate I save about 24 hours a year in time by using SlickRun instead of clicking on application icons, moving the mouse cursor around, clicking in fields, typing in things which I have typed in a million times before, etc. So what did I do with that extra 24 hours, most likely I frittered the time away doing something completely useless, but that is not the point of this post.

You can download SlickRun from http://bayden.com/slickrun. Make sure you also check out the online help and the advanced help pages.

AutoSPInstaller – SharePoint Installation & Configuration Made Simple

I have completely abandoned installing and doing initial SharePoint configuration the old-fashioned hard way using a lethal mix of installers, Central Admin, PowerShell and an easily distracted mind.

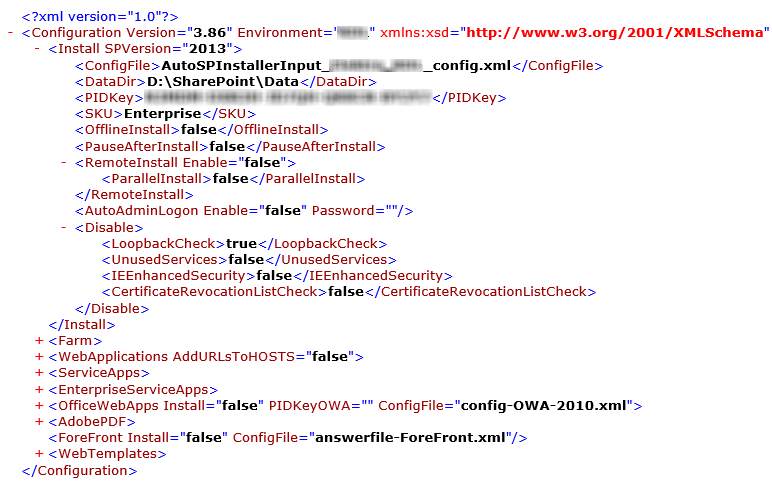
I now use AutoSPInstaller from CodePlex to make all my SharePoint installation and configuration tasks a breeze. OK that is a lie because using AutoSPInstaller is also very hard as it requires you to painstakingly hand code an unforgiving XML configuration file using an IntelliSenseless tool such as Notepad.

autospinstaller02

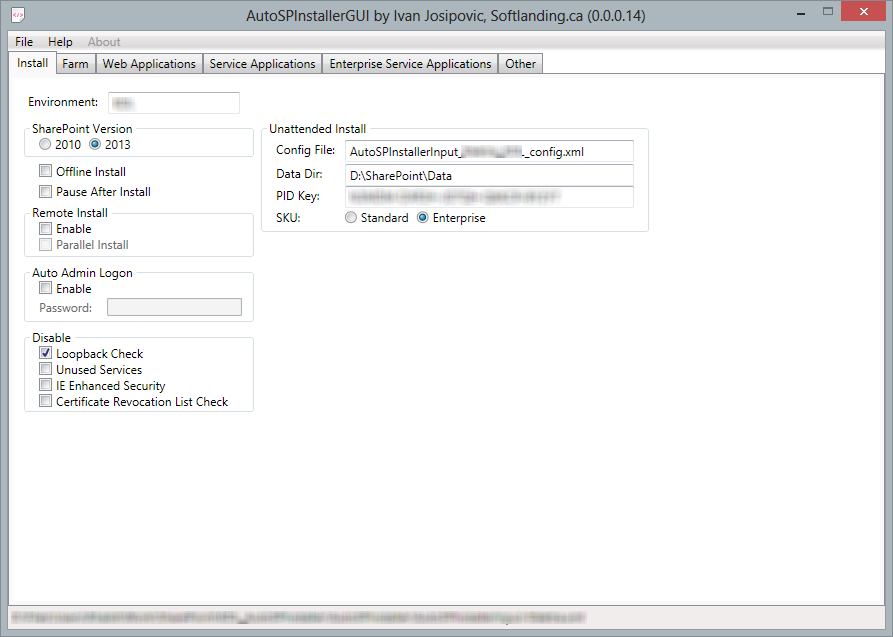
Fortunately for us Ivan Josipovic found the time to create AutoSPInstallerGUI which makes creating the AutoSPInstaller XML files a walk in the park. Thanks Ivan!

autospinstaller03

AutoSPInstaller is a set of PowerShell scripts which use the XML configuration file to install all the SharePoint components including Service Packs, Cumulative Updates etc. The scripts will then setup the managed accounts, create and configure all the service applications, search topology, user profile synchronization, web applications, site collections and bunch of other configurations typically done on a new farm such as IIS, ULS and usage log settings, object cache accounts, email settings, etc.

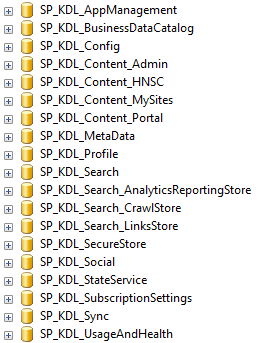
Plus it sets up all the SharePoint databases using sensible naming conventions. No crazy GUID database names. It shocked me too. Crazy idea not having a GUID in the name, but somehow it works. Clearly these AutoSPInstaller guys are not destined for jobs at Microsoft.

autospinstaller01

It also allows you to do remote parallel installation and configuration of all the servers in a farm. Actually this is where AutoSPInstaller and I had a fight. Unfortunately documentation for the tool is well non-existent really. The community has put together some documentation but none of it explains how to use AutoSPInstaller to configure multiple servers in a farm. I struggled with this for quite and while and then realized I was wasting more time to get this to work then it would take me to manually configure the additional servers. This is not something I have had the time to figure out, but despite this problem AutoSPInstaller has been a huge time saver in setting up servers in a consistent manner.

Once you have created a configuration file for a farm it is easy to reuse this for other similar farms or for different environments; production, staging, QA. The configuration file can safely be re-run multiple times to fix issues or rebuild parts of the farm you may have removed. For instance you can delete a web application, site collection or a service application and re-run the script to recreate it. I also find that the configuration file acts as documentation of everything done to setup and configure a farm.

AutoSPInstaller and AutoSPInstallerGUI are huge time savers and are now part of my essential SharePoint toolkit.

SharePoint Branding Examples

Have you ever had a customer say they don’t want SharePoint to look like SharePoint and you want to show them that it doesn’t have to look like SharePoint. When this happens I often show them a few public SharePoint sites that show them what can be done with branding SharePoint. My favourite is ferrari.com. Ferrari has been using SharePoint for their site since Microsoft Office SharePoint Server 2007.

spexamples01

But if you are looking for a site more in tune with your customers business you may want to look at one of the following sites for inspiration.

Top SharePoint Internet Sites

http://www.spsdemo.com/livepivot

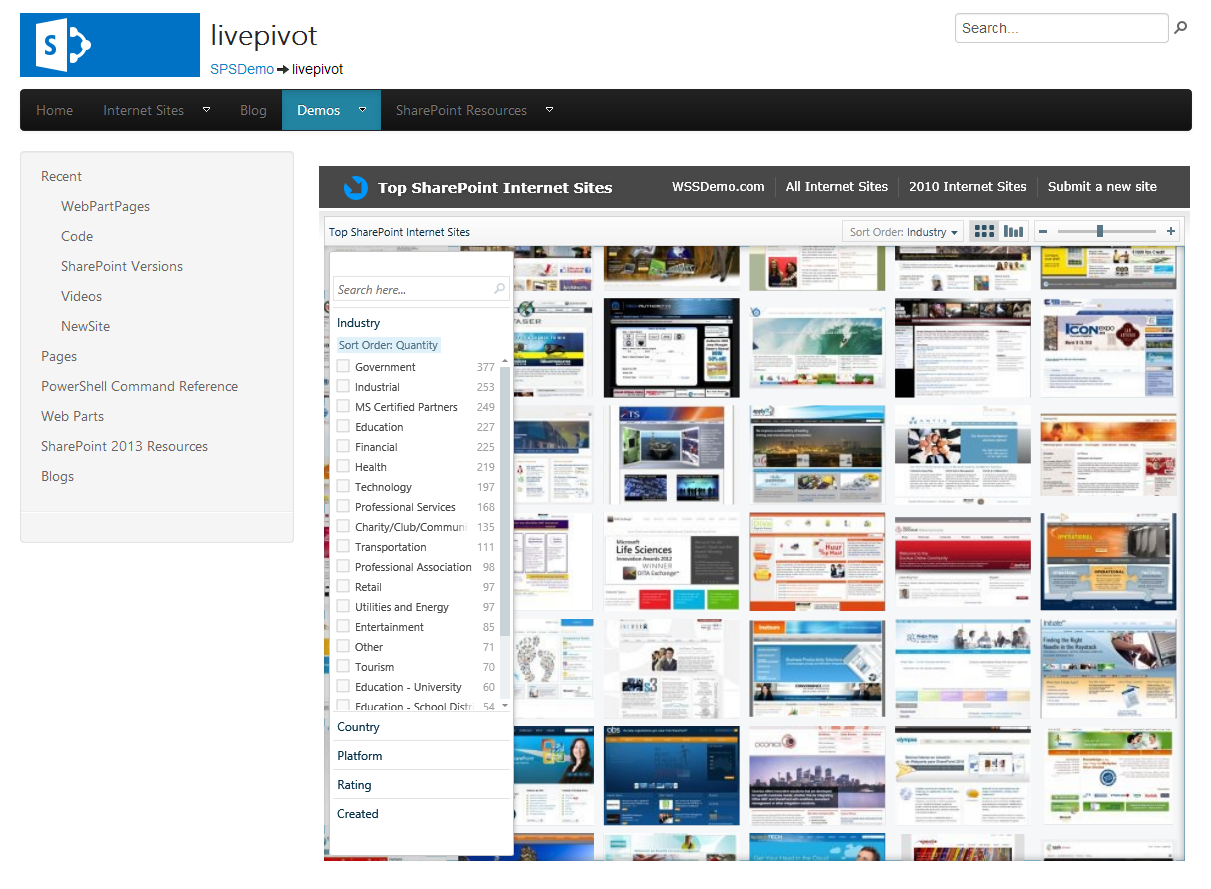
This site use Microsoft’s live pivot viewer and if are like me and attracted to bright shiny objects that waste your time this is a great way to view a bunch of SharePoint sites and filter by industry, country, platform, etc. and just click things to watch the pretty little images rearrange themselves on the page.

spexamples02

Top SharePoint Sites

http://www.topsharepoint.com

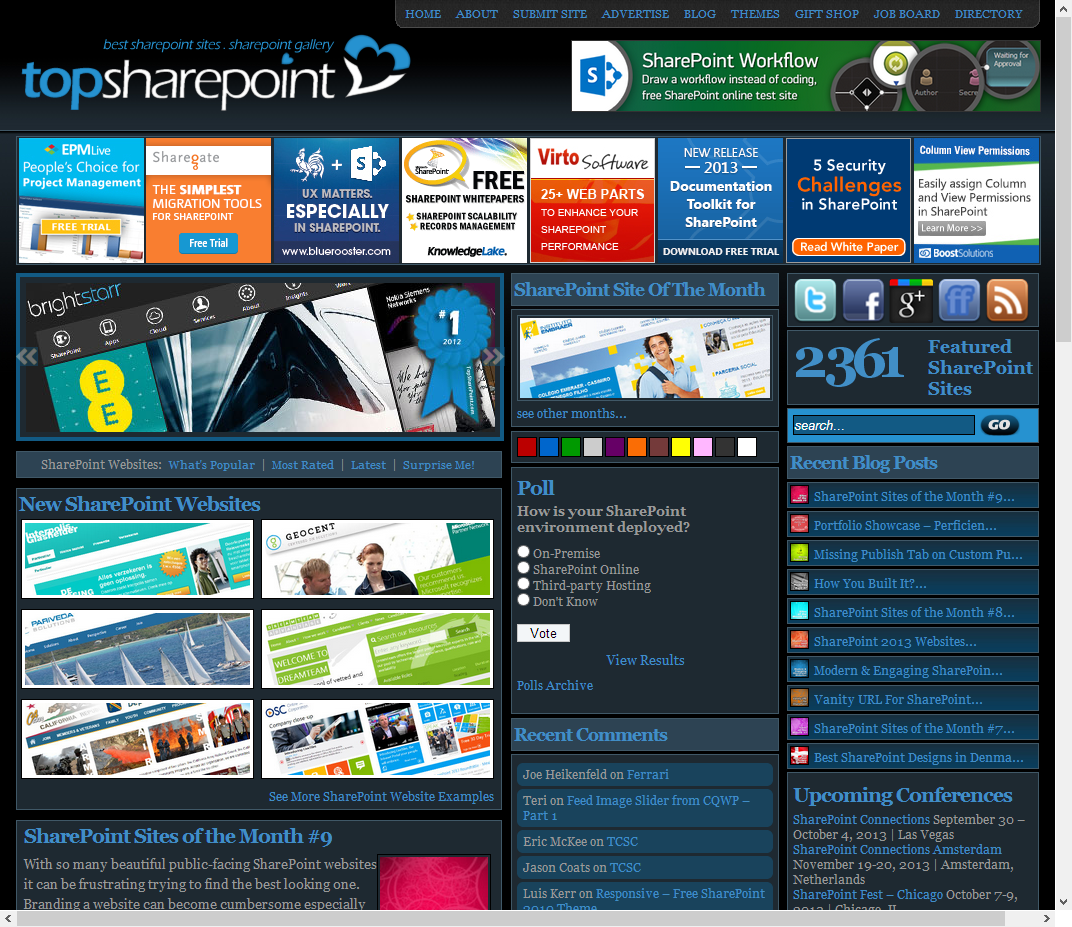
This site also has lots of examples of SharePoint branding. The site is too cluttered for my liking, but it is fairly easy to find relevant sites by using the Search box on the right of the page.

spexamples03

Trello.com – Chrome Extensions

I use Trello to plan and manage software projects as well as a weekly planner to keep track of my work related tasks.

This is a list of my favourite Google Chrome extensions for Trello which make it easier to use:

Scrum for Trello

Adds functionality to estimate and track story points or hours. I wrote a detailed post on this at Trello.com – Estimating & Tracking Hours.

https://chrome.google.com/webstore/detail/scrum-for-trello/jdbcdblgjdpmfninkoogcfpnkjmndgje

CardCounter for Trello

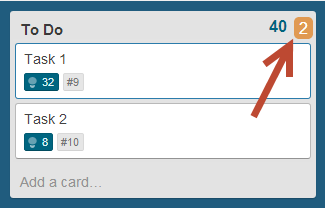
Shows the number of cards in each list at the top right of the list.

https://chrome.google.com/webstore/detail/cardcounter-for-trello/miejdnaildjcmahbhmfngfdoficmkdhi

trelloaddin01

Trello.com – Estimating & Tracking Hours

This is a follow-up to a previous post I wrote on Trello.com. Trello currently does not support adding estimates or tracking hours against cards. This post shows you how to do that using a Google Chrome extension called Scrum for Trello.

First of all use Google Chrome for working with Trello as I have found that Internet Explorer can be temperamental when working with boards. Also you need Chrome to use the extension.

After you install the extension, open a card and edit the title. You will see numbered buttons below the title field

trelloest01

These buttons are story points. I don’t care much for story points because at some point unless you have all the time in the world you have to explain how a story point translates into hours to somebody who doesn’t really care what the story point is. I have read all the goodness about why story points are better than hours but I still like hours, it works for me. Both story points and hours work with the extension. If you like story points go have fun.

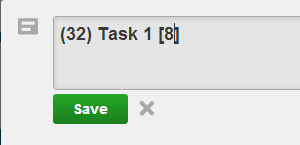
So you can press one of these buttons and it essentially puts the number in round brackets before the card title. Since all the extension is doing is hacking the card title to track information, you can either manually choose to add the number in brackets before the title or you can edit the number after you press one of the buttons. And no there appears to be no way to change the list of story point numbers in the buttons that appear below the title. I have changed the title below to show 32 hours.

trelloest02

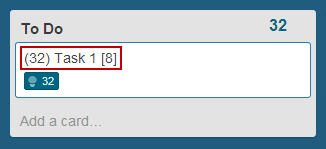
After saving it will look like this

trelloest03

When you close the card and view the board the extension will read the numbers and show them at the bottom of the card, total up all the cards in a column and show the total at the top of the column and show the total of all the columns at the top right of the board.

trelloest10

Now if you want to also keep track of how many hours are completed on each task you can edit the title and add the number of hours completed in square brackets at the end of the title. I am changing the title below to show 8 hours have been completed.

trelloest05

This is what the card will look like after the change

trelloest06

Sometimes after you edit the title and close the card, the board does not reflect the changes to show your edits. For example below you still see the bracketed numbers in the title.

trelloest07

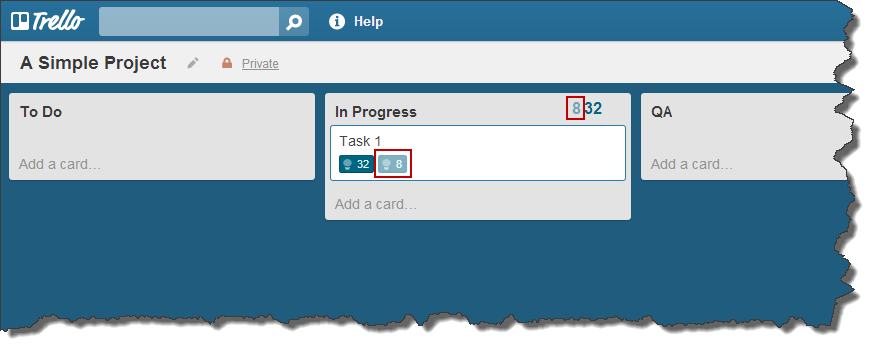
Simply refresh the web page and the extension will do its magic and refresh the numbers. You will see that the completed hours are shown to the right of the estimated hours on the card and also the total completed hours for the column are shown to the left of the total hours at the top of the column. I would have preferred if the column total was shown on the right as well.

trelloest08

Remember these are the completed hours, so do not read this as the hours remaining for the cards. You have to do the mental math to figure that out yourself.

The extension is basically hacking the card titles to manage this information. When you change the hours on the card these changes are not reflected in the activity feed for the card. Then again neither are any other changes to the title of a card.

If you want to use these numbers to feed into a burn down chart you can follow the instructions at http://lsjuanny.wordpress.com/2012/08/17/step-by-step-create-trello-burndown/ to get a serviceable burn down chart for free.

I find using this Chrome extension when planning out a project’s tasks quickly gives me an idea of the number of hours required.

Configure SharePoint outgoing email to use an SMTP server which does not listen on port 25

You just found out that the SMTP server that your SharePoint server needs to configure in the Outgoing E-Mail Settings does not listen on port 25.

The bad news is that SharePoint does not allow you to configure this. It always connects to port 25 because only the foolhardy would use an alternate port.

The good news is the steps to get around this using the SMTP service installed on to the SharePoint server have been documented by David Lozzi at Sending SharePoint emails through alternate ports

If you are using Exchange Online as your SMTP server to send emails you can follow the instructions at Step by step configuration of Outgoing Emails from SharePoint to Microsoft Online

Trello.com – Free Online Scrum Task Board (aka Whiteboard with Post-its)

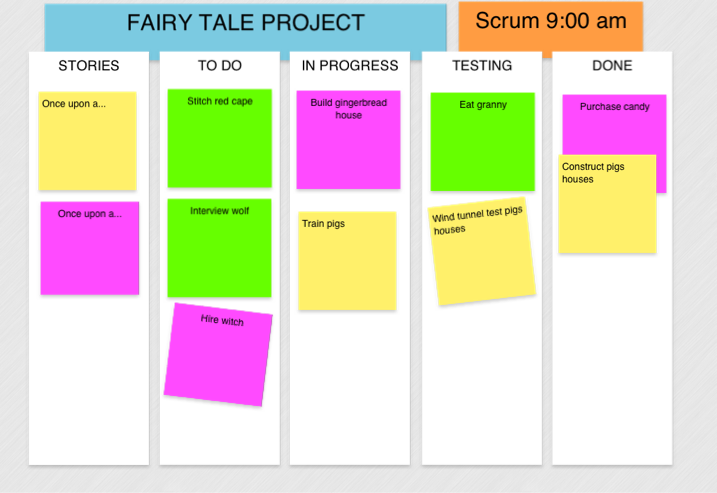
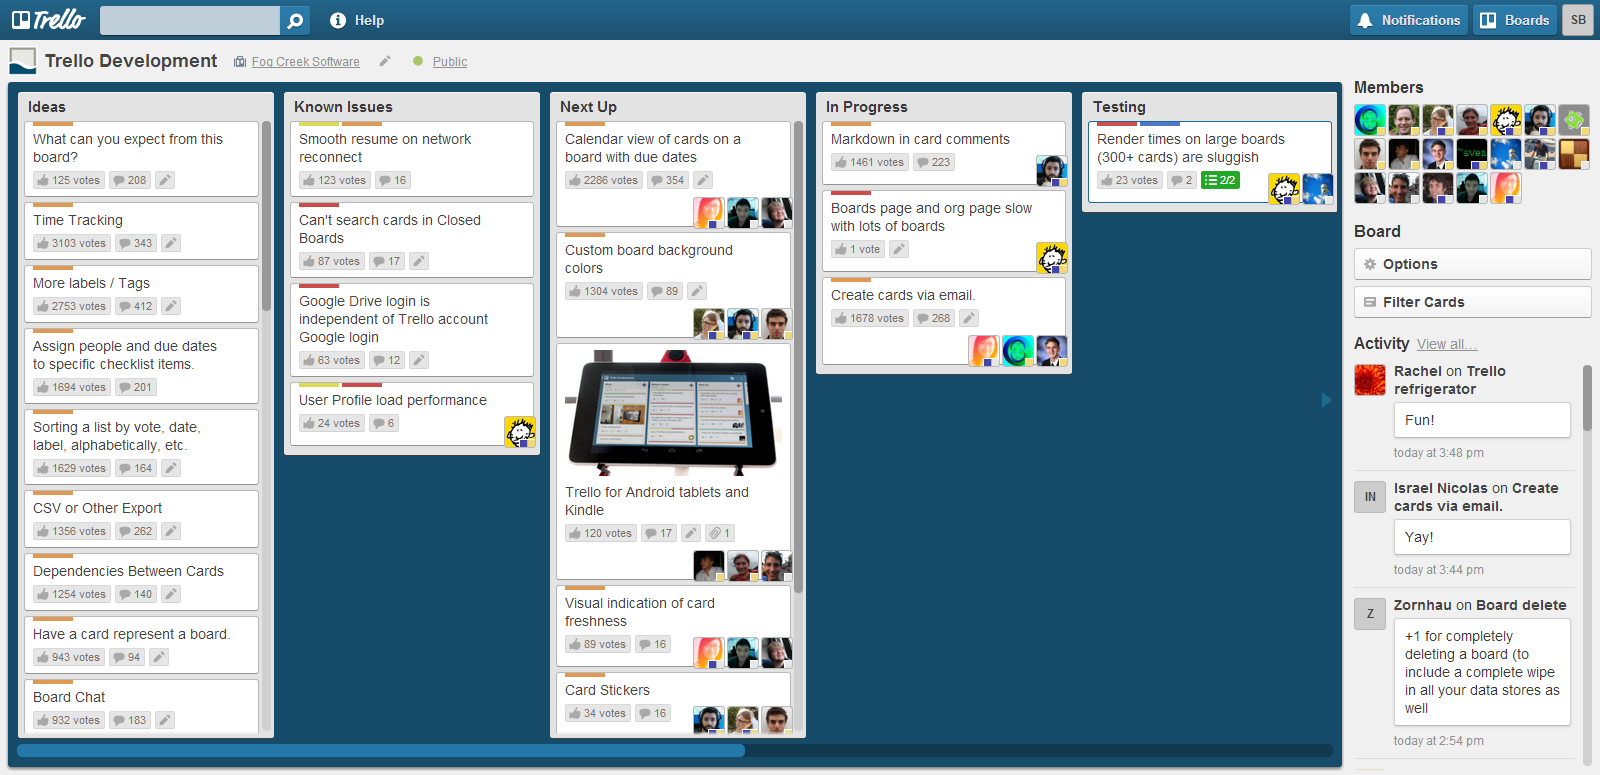
Managing any kind of software project requires planning out tasks, assigning them to people,  tracking the status of each task and so on. Many teams use a whiteboard with sticky Post-it notes arranged in columns, with column names such as “Stories”, “To Do”, “In Progress”, “Testing” and “Done”. If you are Agile of mind you might call this a Scrum Task Board for the not so agile it might be a Project Planning Board. Regardless of your agility and what label you give it, it kind of looks like the one below.

trello01

Whiteboards are simple technology, mostly hard to break and great at communicating project information to the team as long as the entire team has physical access to the whiteboard.

Nowadays teams tend to be geographically dispersed and virtual and can benefit from my favorite online whiteboard Trello.

trello02

My wallet and I like things which are simple and cheap. Trello is almost as simple as the whiteboard and according to their site “Trello is free, now and forever”. Hmmm…sounds too good to be true. Well it is at least free for now so let’s get planning.

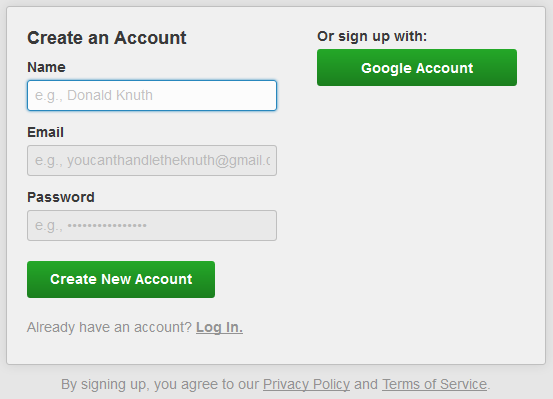
Every user that interacts with Trello must have a Trello account. Signing up is easy, you can use your Google account or if you are a rebel and don’t have a Google account you can use your email address and a password to sign up. Remember to write the password on a Post-it so you don’t forget it 😉

trello03

Take a tour of all the Trello features at https://trello.com/tour or if reading is not your thing watch the movie.

Here is some Trello terminology to keep you on the right track:

  • Organization ≈ an organization (don’t worry it gets more complicated below)
  • Board ≈ whiteboard
  • List ≈ whiteboard column
  • Card ≈ Post-it note

Here are some of the things I like about Trello in no particular order:

  1. It is browser based and Chrome keeps track of my password so I don’t need one of them Post-it thingies stuck to my monitor.
  2. The interface is about as clean and simple as…well…a whiteboard.
  3. You can drag and drop cards without getting them stuck to your fingertips.
  4. Cards change size so you don’t have to use multiple chained Post-its to get your point across.
  5. You can attach files, videos, pictures, hyperlinks and comments to a card. Try that with a Post-it.
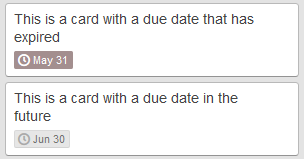
  6. Cards can have due dates and get highlighted (subtly) if the due date has passed you by.
    trello05
  7. You can assign cards to multiple members.
  8. You get an email when a card is assigned to you.
  9. You can subscribe to a card, so if somebody changes it or moves it to another list you get notified by email. Great for keeping on top of things.
  10. Cards can have a checklist of sub-tasks associated with that card and you can see at a glance how many of the sub-tasks have been completed.
    trello04
  11. You can set up multiple organizations in one account. Nice feature if you work with multiple organizations like I do and/or get invited to Trello boards from other organizations.
  12. You can create as many boards with as many lists and cards as you want.
  13. You can invite other users to be members of an organization or board.
  14. Cards can be color coded (kind of) and categorized.
  15. Lots of keyboard shortcuts as you would expect of any good application.
  16. Activity feed for each card and board shows who changed what.
  17. You can filter the board by category or user to show only those cards for the selected category or user.
  18. Works almost identically in the browser, on the iPad, iPhone, Android and Windows 8 (truthfully I have only tested it on the Apple devices, so I am guessing about the others).
  19. The learning curve is most definitely lacking in curves. It is so simple to use that if one of your team members doesn’t get it, then you need to get a replacement team member 😉

Wow that was a lot of things to like about Trello. To bring some balance to the universe here is what I don’t like about it:

  1. You can’t filter cards in the mobile apps.
  2. You can’t have different colored cards. You can categorize cards which gives them a different colored teeny tiny bar at the top of the card, but I want my boards to be colorful like real life whiteboards with all the neon colored Post-its.
  3. Every member assigned to a board has the same rights. That is they can change anything on the board and obliterate it or parts of it if they so desire. Now this is a good thing from an Agile mindset because everybody should be equal and have an equal say blah blah blah, but people are well human and make mistakes. The good news is that you can see who to blame 😉 from the board activity feed, because every mistake is recorded for all to enjoy. If you scrounge together the $25/month to upgrade to Business Class you get a bit more control over this, but members with edit rights can still cause havoc. Mind you the same problem exists with real world whiteboards unless you laminate the Post-its and superglue them to the board.

I love a company that eats it’s own dog food. Trello uses Trello to manage development of their own product. Check out the Trello Development board which is a good example of how to structure a project with multiple releases.

They also use a Trello board to share Trello Resources such as tips, usage examples, browser extensions etc.

Trello is a fantastic tool that I find I am using on more and more projects and I hope it does stay free forever. Go forth and plan.

I have written a follow on post about estimating and tracking hours with Trello.

Verify SharePoint outgoing e-mail settings using Telnet

If you have configured your outgoing email settings but are having issues sending emails from SharePoint verify that your SMTP server is allowing connections from your SharePoint server using Telnet.

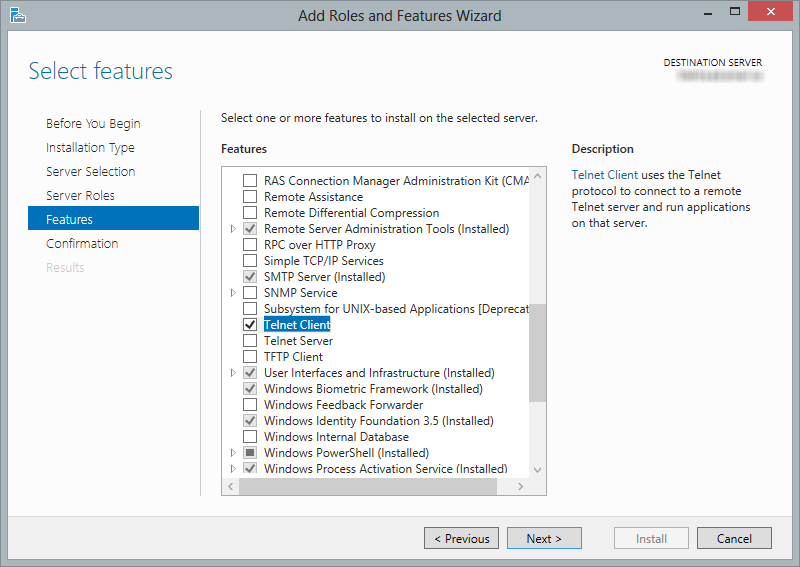
If your SharePoint server does not have the Telnet Client installed you can install this from the Server Manager > Add Roles and Features wizard in Windows Server 2012. The Telnet Client is in the features list.

telnetclient01

Eric Lough has a detailed article Troubleshooting SharePoint SMTP Errors via Telnet which describes the telnet commands to use.

If the issue turns out to be Exchange Server not allowing your SharePoint server to relay emails and you can’t find the Exchange server guru in your organization or you are the Exchange Server “guru” in your organization follow George Khalil’s instructions at Configuring outgoing email in SharePoint 2010 with Exchange 2010 – Step by Step Guide to get you out of that mess.

Migrate from classic-mode to claims-based authentication in SharePoint 2013 the easy way

When migrating a content database from a SharePoint 2010 web application using classic-mode authentication to a SharePoint 2013 web application using claims-based authentication Microsoft recommends converting the web application and all its content databases to claims-based authentication in SharePoint 2010 first and then migrating the web application and all its content databases over to SharePoint 2013. See Migrate from classic-mode to claims-based authentication in SharePoint 2013 for all the painful details.

That is a laborious way to do it, because it implies the following process:

  1. Recreate the web application and all its content databases in a Test farm
  2. Convert the web application to claims-based authentication in the Test farm (unless you feel this is something you want to do in your Production farm just to keep your job interesting).
  3. Detach the database(s) from the SharePoint 2010 Test farm’s SQL Server, copy them over to the SharePoint 2013 Production farm’s SQL Server and attach them
  4. Run Mount-SPContentDatabase etc.

If you are the kind of person who craves this kind of excitement in their lives stop reading now because you will be disappointed by the simplicity of the process described below.

The quick and easy way to do the above:

  1. Detach the database(s) from the SharePoint 2010 Production farm’s SQL Server, copy them over to the SharePoint 2013 Production farm’s SQL Server and attach them
  2. Run Mount-SPContentDatabase etc.
  3. Run the PowerShell below to convert the content database(s) to claims-based authentication
$wa = Get-SPWebApplication http://www.mydomain.com
$acc = 'DOMAIN\SP_Farm'
$arguments = New-Object Microsoft.SharePoint.Administration.SPWebApplication+SPMigrateUserParameters
$arguments.AddDatabaseToMigrate($wa.ContentDatabases[0])
# The line above only adds the first content database in
# the web application for demonstration purposes. You may
# need to iterate through your databases and add them all.
$wa.MigrateUsersToClaims($acc, $false, $arguments)

The second easier method above gives you the same results as the first laborious process but with considerably less pain.

Thanks to Steve Peschka for providing the PowerShell commands above and Chris Weldon for making the PowerShell commands behave in a civilized manner. A couple of points to note from their blog posts, first do not change the name of the parameter “$arguments” to anything else as this causes problems. Second, if you use the SharePoint farm account as I did above then make sure the second parameter to the MigrateUsersToClaims method is set to $false.

For migrations Microsoft always talks about Detach/Attach for migrating databases but I prefer Backup/Restore, but that is something I will discuss in more detail in another post.